Setting Up Your Development Environment
Before we begin writing WebAssembly modules or integrating them into Rails 8, we need to set up a proper development environment.
This involves installing Rails 8, configuring Rust for WebAssembly, setting up Importmaps, Propshaft, and TailwindCSS, and ensuring that our system is ready to handle .wasm assets efficiently.
1. Install Ruby on Rails 8
First, ensure you have Ruby 3.3 installed:
ruby -v
If you don’t have Ruby 3.3, install it using:
rbenv install 3.3.6
rbenv global 3.3.6
Now, make sure you’re running the latest version of Rails 8. If not, install it:
gem install rails -v 8.0.1
To verify the installation, check the Rails version:
rails -v
Now, create a new Rails app with TailwindCSS:
rails new wasm_app --css=tailwind
cd wasm_app
2. Install Rust and WebAssembly Toolchains
Since WebAssembly is commonly written in Rust, we need Rust installed:
curl --proto '=https' --tlsv1.2 -sSf https://sh.rustup.rs | sh
Now, install the WebAssembly toolchain:
rustup target add wasm32-unknown-unknown
cargo install wasm-pack
3. Set Up your Rust src code which will be built into a WASM Module
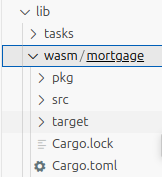
a) Create a new folder /lib/wasm in your Rails app and then goto this folder in your console or terminal
> cd _your_rails_app_root_
> mkdir lib/wasm
> cd lib/wasm
b) Create a Rust Program that we will write to do some operations and then convert it to a WebAssembly Module:
> cargo new --lib modulename
> cd modulename
c) Configure Cargo.toml
[package]
name = "modulename"
version = "0.1.0"
edition = "2024"

[lib]
crate-type = ["cdylib"]

[dependencies]
wasm-bindgen = "0.2"
d) Write Rust code (in src/lib.rs)
use wasm_bindgen::prelude::*;

#[wasm_bindgen]
extern {
    pub fn alert(s: &str);
}

#[wasm_bindgen]
pub fn greet(name: &str) {
    alert(&format!("Hello, {}!", name));
}

// A simple function that adds two numbers
#[wasm_bindgen]
pub fn add(a: i32, b: i32) -> i32 {
    a + b
}
e) Compile Your Rust Code to WASM
> wasm-pack build --target web
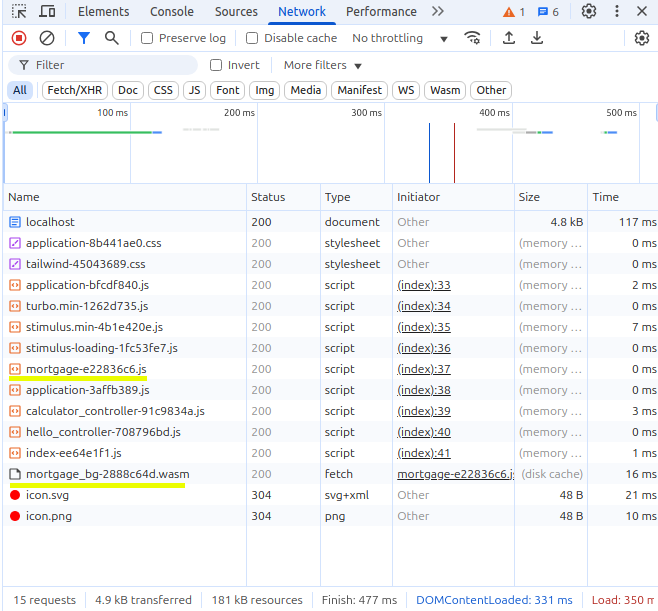
This generates a pkg directory with your compiled WASM and JavaScript glue code:
- A .wasm module file
modulename.wasmormodulename-bg.wasm - A wasm module gluecode file
modulename.js(which you can use in Importmaps)
> cd ../../..
f) Copy/Paste your both .wasm and .js files of your WASM Module to their respective folders so that they are available to both Propshaft and Importmaps within your Rails app:
> cd _your_rails_app_root_
> cp lib/wasm/modulename/pkg/modulename.wasm app/assets/wasm/
> cp lib/wasm/modulename/pkg/modulename.js app/javascript/wasm
4. Set Up Propshaft and Importmaps for WebAssembly
As discussed in previous page:
Propshaft
Rails.application.config.assets.paths << Rails.root.join("/app/assets/wasm")
<script>
  // Set path to your WASM Module File.
  // I usually keep these in /app/assets/wasm
  window.RAILS_ASSET_URL = "<%= asset_path('_YOUR_WASM_MODULE_FILENAME_.wasm') %>";
</script>
ImportMaps
pin "_YOUR_WASM_MODULE_GLUECODE_FILENAME_", to: "wasm/_YOUR_WASM_MODULE_GLUECODE_FILENAME_.js"
This ensures that Rails correctly loads WebAssembly dependencies.
5. Modify _YOUR_WASM_MODULE_GLUECODE_FILENAME_.js to Load the WASM Module from RAILS_ASSET_URL
This is a hack, thus each time you modify and rebuild your WASM Module, you might need to modify your _YOUR_WASM_MODULE_GLUECODE_FILENAME_.js:
    if (typeof module_or_path === 'undefined') {
        // Use the Rails asset path if available, otherwise use relative URL
        module_or_path = window.RAILS_ASSET_URL ||
        new URL('mortgage_bg.wasm', import.meta.url);
    }

